QUESTIONS... and detailed answers
Most people have a lot of questions about their upcoming hardwood flooring project. I'm sure you do too. We've collected the most common questions we're always being asked and provided the answers for you below...
The Biggest Questions
Some subjects need a little more explanation. So we compiled the 3 most important and commonly asked questions into detailed downloadable PDF articles for you…

General Questions
Most average sized houses in Naperville have a living room, dining room, hallway, entrance and a couple of bedrooms. If the hardwood floors are in good shape and don’t need any repairs and you’re going to keep them natural and not stain them, you’re looking at an average of 3 days. Bigger and more complicated layouts will obviously take a little longer.
One the first day we remove all the existing finish and prep the floor for the first sealer coat. Depending on the size of your home, we can usually apply this first coat by the end of the day. This is the longest day. Over the next 2 days the remaining coats are applied.
If you would like to have your floors stained, be prepared to add at least another day to the process. Other extras like restoring stairs, removing carpet and fixing any repairs that are needed will also add extra time to the job.
Yes, it’s possible with a few restrictions.
Towards the end of the job, while the finishes are being applied and are drying, you won’t have access to those areas for at least 4 hours. For the finish coat we like to keep everyone off it for 24 hours to ensure a top quality job without any contaminants. This can be a hassle if you are having your entire house refinished or main access hallways etc. It may be best to stay somewhere else for a few nights if this is the case.
We are fully insured with up-to-date Liability Insurance and Workers Compensation Insurance. We are happy to show you our policies and share our IWCC number so you can check our coverage for yourself.
LIABILITY INSURANCE:
We have full Liability Insurance coverage for $2,000,000.00.
WORKERS COMPENSATION:
We’re also fully up-to-date with our Workers Compensation coverage.
Under the Illinois Workers Compensation Commission (IWCC) legislation, as the property owner, you are ultimately responsible by law to make sure that everyone working on your property is covered by Workers Compensation.
If the worker you hire doesn't have his own coverage then it is your responsibility to take out and pay for proper coverage for them. Please be very wary of a company that doesn't have adequate Workers Compensation coverage.
It's also important to note that you're not in the clear just because a company is registered with the IWCC. If they are not in good standing or they have been delinquent with their account, they are not covered. Again, you become liable. Don't just take their word that they are covered and in good standing. Take the time to check into it yourself. To protect yourself you need to check a business' coverage. You can do this by email or over the phone:
The email address to write to is: [email protected]
Or you can call the IWCC Information Unit at – (312) 814-6611 or toll free at (866) 352-3033
If you have a few small pieces you need help with we can assist you. But because we’re not professional movers, our insurance won’t cover us for any damage done to your furniture if we have a mishap.
If you need, we can provide you with the name and number of a professional moving company our clients have been happy with. They’ll do a great job of carefully removing your furniture prior to our arrival and then carefully replace it once the finish is dry.
Yes, we’re happy to remove any carpet and underlay for you. We will cut it up, roll and tape them into small bundles with the sharp wood tack strip pieces from around the edges of the room placed inside. That way they will be easy (and safe) for you to put out on garbage day. If you would rather have us dispose of it, please let us know when we meet to discuss your project so we can add that option to your quote.
If you would like to save some money and remove the carpet, underlay and tack strips yourself, we’ve written a detailed guide that answers this for you: “How to Remove Carpet Without Damaging Your Hardwood Floors”.
You can find it on the Downloadable Info Sheets page.
Naperville is our main area but we also work in La Grange Park, La Grange, Hinsdale, Western Springs, Clarendon Hills, Downers Grove, Oak Brook, Woodridge, Lisle, Glen Ellyn, Wheaton, Burr Ridge, Lemont and Homer Glenn.
If you pop over to the Dustless System page you can read our detailed explanation of how we effectively handle dust containment.
Please follow this link over to our About Us page and there you’ll get to see our handsome photos and a little bit of info about each of us.
Restoring hardwood floors is a very physically demanding job. During the week we work extremely hard. By the time the weekend rolls around we’re ready for our beauty rest.
Not only that, we’re also family men and we love to spend as much time with our kids as possible.
If all that is needed is a top coat to finish your restoration and you have an extremely tight schedule, we may be able arrange something on a Saturday but please don't count on this – it’s hard to say no to the kids!
When we start a restoration we like to show up right at 8am. This gives us a good start to the day so we can get a lot done. Of course, if that’s not good for your schedule, we can arrange another time that’s more suitable.
When we do the recoats, it depends on your schedule. If you’ve entrusted us with a key to your home like most of our clients do then it won’t matter. Otherwise we’ll work around your schedule – morning or afternoon – whatever is best for you.
The Our Guarantee page will fill you in on all the juicy details.
We happily accept cash and checks.
We understand many people like to collect points or air miles with their credit cards. We can arrange credit card payment if you insist but because we have to add a 3.5% surcharge to your invoice to cover the transaction fees most find it’s not worth it.
We know this isn’t a cheap project and anything that can be done to save some money is always welcome.
The best way to save some money would be to take up and dispose of any carpets, underlay, tack strips, staples or unwanted base-shoe and baseboards before we arrive. If you have some handyman skills, you could also look after any needed repairs – we’ll be happy to give some advice on how to do this properly.
After the jobs completed you could install the base-shoe as well.
On the Photo pages, we have feedback we have feedback from our many happy clients. You can also see our numerous 4 and 5 star reviews from happy clients on Facebook, Google, Yelp and other sites.
If you’d like the name and number of the client we’re working with at this very moment, please call or email and we’d be more than happy to share it with you. (Providing our client agrees.)
Finish, Staining and Coating Questions
Many people are worried about this. You may have smelled the rotten fumes from solvent based finishes in the past. Even worse are the fumes from conversion varnish systems (like Glitsa Swedish finishes) which can stink and gas off for weeks, which makes it very uncomfortable to stay at home during this time.
We decided to stop using these nasty smelling and dangerous finishes a long time ago. Now we only specialize in using high-end water based finish systems which have an extremely low non-offensive odor for a short period of time as they dry. As they dry they release water vapor instead of harmful solvents which can damage the health of your family and pets. This makes it much easier for you if you need to stay in a section of your home during the restoration process as you won’t have to worry about being driven out by eye watering fumes and off-gassing.
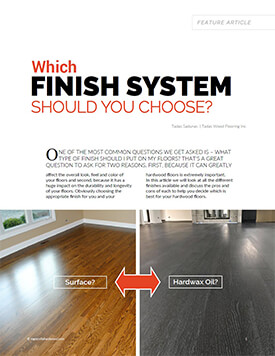
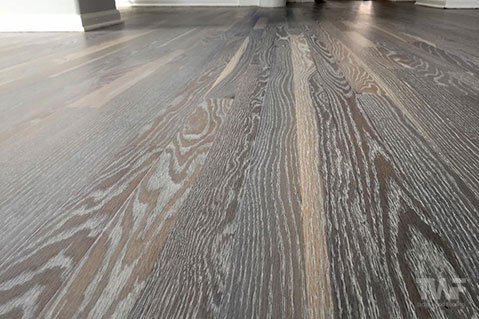
What types of finishes do we use? What do I need to be aware of when choosing a finish for my floor?
We’ve written a detailed PDF guide that answers this question for you in great detail: “How to Choose a Hardwood Floor Finish”. You can find it at the top of this page.
You can also find it on the Downloadable Info Sheets page.
You may have seen some of these new businesses coming out of the woodwork promising amazing results for your floors by just using a “newly discovered” recoating system that is completely sand free. They promise fast, dust free results that are the same or better than traditional hardwood floor refinishing.
For one thing, these systems have been around for a long time and are used by most if not all traditional, professional floor refinishers. Basically it involves using a type of chemical cleaner and a buffer to abrade the top coat of an existing floor and then a new top coat of finish is applied.
Some guys have found it to be faster, easier money as they don’t have to invest in expensive proper tools and equipment to do a complete restoration.
And the truth is in some cases it can be a great option. But… (and this is a big but) your floors have to be in very good shape originally for this to be a viable option. If you have dings, scratches, bruises, stains, greyed wear through areas or any other damage to the actual wood – not just the finish – then no matter how many recoats you do, they will not be removed. That’s what a lot of these guys “forget” to tell you.
If you just recoat over damage, you’ll just have a nice shiny new top coat that highlights the damaged parts even more. A total waste of time and money.
If this really worked as some guys promise, why wouldn’t we be offering it and only specialize in ‘dustless, no-sanding recoats’ too? It would be much easier on us and we’d definitely make more money.
The truth is, the only way to remove this type of wear and damage is to completely remove the existing finish, take the floor back to bear wood, repair the damaged areas and then apply a whole new finish system. Then you’ll have floors that are even better than new because of the latest finishes we can apply.
On the other hand, if your hardwood floor have been restored by us previously and you have followed our cleaning and maintenance instructions, or we have assessed and tested your floors for compatibility, then a clean and recoat could most certainly be an option. (This assumes that the finish is not totally worn through and you are not worried about removing most of the surface scratches.)
In fact recoating your floors every 5 to 10 years is highly recommended. If you have a chance to do them before the finish wears through, it will most certainly prolong the life of your hardwood and reduce the need for re-sanding them down the road.
Just to give you the heads up – we don't promise we can recoat floors that we haven’t previously restored. We will need to do a thorough test on your floors first to make sure it's even an option. This is because out of all the hardwood restoration processes, recoats have the biggest failure rates. And it’s always the same thing that causes it – the homeowner hasn’t followed good care instructions and now waxes, oils or some other type of chemical has been applied or spilled on the floor which now prevents the new finish from adhering. Even the “recoat specialists” have high failure rates that you can read about on many forums all over the internet.
Yes, doing it properly and right will cost a little more and take a bit longer, but we feel the exceptionally better end results are worth it.
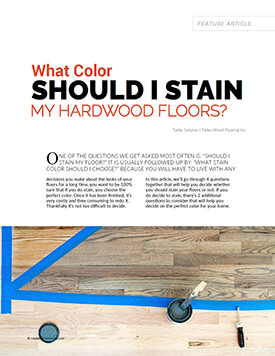
Our PDF guide: “Staining Hardwood Floors” will answer this question in detail for you. It can be downloaded from the link at the top of this page.
You can also find it on the Downloadable Info Sheets page.
Repair and Sanding Questions
We try to preserve as much of your floors as we can, so when we sand we try to remove as little wood as possible. That means that if you have very deep scratches or dings it may be best for the future life of you floor to replace the damaged areas with new wood.
We can always sand deeper in these areas if you want us too but it’s good to be aware that the more we take off the less wood you end up having. It’s important to remember your floors can only be sanded three to five times at most.
All things made from wood will expand and contract because of humidity changes from season to season during the year. Especially here in the Midwest we have big changes between seasons. This is what causes cracks and gaps in your floors, especially if you have wide plank floors.
In the colder months when you turn the heating system on, the humidity in your home will drop quite a lot. When this happens, everything made from wood, including your floors will contract and shrink a little.
When we sand and prep your floor we trowel filler over your entire floor and force it into these gaps. Down the road you may still see some minor gaps again though because of the reasons we talked about above. It’s a normal, natural occurrence and nothing to be concerned about, it won’t affect the structural stability of your floors at all and when the warmer weather rolls around and you open your house and turn off the heating system your floors will expand and the minor gaps will disappear. Because the boards will also expand, you may see some filler pop out of the previous gaps that were filled. Again this is nothing to be concerned about, you will just need to clean-up this loose filler if it ever comes out so it doesn't get tracked around the floor ad scratch it.
If you’d like to reduce the occurrence of gaps during the colder months you could invest in a humidifier to control the humidity level to 45 – 55 percent inside your home.
Yes, this won’t be a problem. We’ll just need to have a look at what damage needs to be repaired so we can provide an estimate. If you have existing carpet covering a water damaged area that prevented us from knowing it was there, we’ll inform you immediately and come to a decision about how to proceed together.
On top of that it’s also important to find the source of the damage so it can be repaired and future damage is prevented.
No, it’s not necessary to remove them if you’d rather not because they’re in good condition. We can get close to them with our sanders and the remainder of the old finish we can remove with our hand scrapers. There may have a few small scuff marks afterwards so a few small paint touchups may be needed if you decide to keep them in place.
Solid wood base-shoe that needs to be coated with the floor... yes. Painted base-shoe and baseboards... no. But we have a great partnership with a carpenter and painter that we’ll give you the contact details for if you have baseboards needing to be installed and painted after we’ve finished.
We don’t remove existing base-shoe and re-install it because it will more than likely be damaged as it’s being removed and it will be impossible to re-install properly.
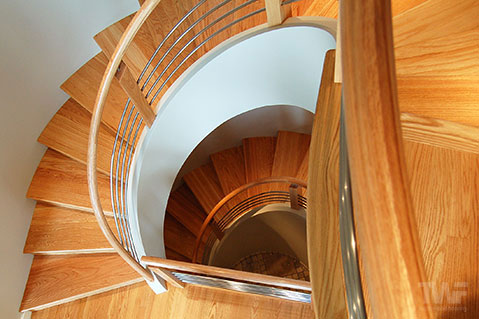
We restore the treads (the part you walk on) and sometimes the risers (the vertical part between the treads) of the staircase if they’re solid wood. We don’t sand spindles, railings or stringers. This is far beyond the scope of floor restoration work and you’re better off having a craftsman who specializes in this field to take care of this for you. We can provide you with a phone number of a business that does this specialized work.
A lot of risers are made of a thin veneer over the top of a plywood backing. Because of this they can’t be sanded. You have a couple of choices as to what you can do with them.
A very popular option that you’ll see in a lot of the home designer magazines is to paint them with a durable paint to match the rest of the stairs components. It gives a very high-end, classy look as well as opening the space to provide an airy, spacious look. It also makes them very easy to touchup with a fresh coat of paint down the road.
The second option to restore risers involves a little more work and money – having them re-veneered. We will match the veneer to your existing treads, install them and then coat them with the same finish system you decide to use on your floors.
You can read more about refinishing staircases on our Stair Restorations page.
Short answer is maybe.
Here's the long answer...
This is one of my biggest pet peeves with the engineered, pre-finished hardwood flooring industry. Most of the salesman that sell this type of flooring will rave about how it can be re -sanded a number of times. This is a huge misconception and they are doing the people who are buying engineered flooring based on this misleading information a giant disservice.
Technically, yes, they can be sanded a number of times. But, practically and realistically, you’re unfortunately going to have a fun time trying to find someone to professionally do it for you.
The only time we will consider sanding an engineered floor is if it has at least a 5/16th wear layer and it has been securely glued down to a very flat sub-floor.
We never put our big sanding machines on an engineered floor that has been installed as a floating floor. Unfortunately, this is exactly how most of these floors are installed. Not only that but most engineered floors have far less than a 5/16th wear layer, some wear layers are as thin as 1/16th.
Because the companies manufacturing these types of flooring know it can't be re-sanded, they apply very tough aluminum oxide finishes to them. In order to sand through this very tough wear layer, you need a very coarse grit sanding belt. The problem with this is, once you have sanded through the tough finish, this coarse sandpaper will very quickly sand through the thin layer of wood like a hot knife through butter.
On top of this, a lot of installers don't prep and level the sub floor properly, leaving it very uneven. So if we were to try sanding one of these floating floors, the weight of our belt sander alone would buckle the floor, cracking the joints and our sander would be jumping all over the place.
This would make it virtually impossible to sand the floor evenly and there would be a huge risk of sanding through the very thin layer of wood. It’s a tough go no matter which way you look at it and we haven't even talked about sanding the bevels that a lot of these floors have between boards.
Unfortunately these floors are becoming very, very popular. I say that not because I don't think they have their place, they do – in fact they're one of the only types of wood floors you can install in some areas.
But a lot of people with them in the next few years will be trying to have them refinished to remove the deeper scratches—yes, even these tough aluminum oxide factory applied finishes scratch and dent—and they may not be able to refinish them because of the above reasons.
Of course, we’d be more than happy to stop by your home and check if your engineered floors are a candidate to be sanded or not. But please keep in mind the above issues that are out of our control as we do.
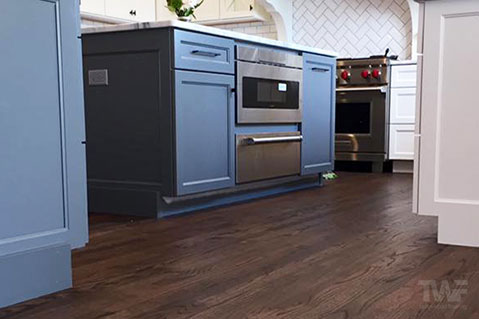
Yes, we can sand and refinish where your appliances sit. But because we aren’t licensed to do plumbing, electrical or gas fitting work, if need be, you will need to have these professionally disconnected for us before we arrive.
After Completion Questions
In an ideal world, waiting a week before replacing your furniture would be great but we know that this isn’t always possible. The finishes we use are 70 – 80% cured after two days, so we suggest you to wait at least until then. If it’s convenient to wait longer, that would be great, but if you can’t, just make sure to be extra careful over the next couple of days.
Please be sure to put felt pads you under your furniture.
With your area rugs, we advise you give the floor at least 2 full weeks to let the finish cure before putting them back on your hardwood floor.
A lot of the older solvent based finishes would badly change color over the years. You could especially notice it on older floor when you moved an area rug. This is caused by ultra violet sunlight rays – either direct or indirect. Unfortunately there wasn’t much that could be done about this other than move your rugs around from time to time or keep your shades down during the sunniest part of the day, both of which aren’t very practical.
With the recent advances of water based finishes and the anti UV additives incorporated into the higher-end products, this natural phenomenon can be greatly reduced if you use them. All the finish systems we use have UV protection.
We have an in-depth blog post discussing this topic: Sunlight, UV and Fading Hardwood Floors
How long your floors will last really depends on quite a few different factors. Are you going to wear dirty shoes inside? Do you have pets? How many? Are they allowed to run around on the floors with long untrimmed nails? Will you regularly sweep and clean your floors and follow our care instructions? Will you invest in a good door mat and maybe some runners and area rugs?
There really is no simple answer. You can have a 20 year old floor that still looks great because it has been well cared for and on the other hand have a 2 year old floor that is in bad condition because it’s been horribly abused.
There’s no possible way for us to know how you are going to care for your new floors. We urge you to read and apply the tips in the Cleaning Guide we’ll leave with you at the end of the project, including using the hardwood floor cleaner and felt pads. If you take look after them well, your floors will look great for many, many years to come.
We’ve written an informative guide: “How to Look After Your Hardwood Floors” which will answer this for you.
You can find it on the Downloadable Info Sheets page.
PHOTOS from past projects
HAPPY CLIENT feedback
If you are looking to refinish your floors, look no more. Tadas and his team were thorough and professional from the first moment we made contact. He presented a super detailed estimate with suggestions on different price-points. We chose Option 1 and the result was incredible. We are very happy with the work his team did. Very dedicated, knowledgeable and friendly.Carolina H. | Aurora, IL