Hardwood Floor Refinishing in Naperville — restore your worn floors without replacing
Hardwood floor refinishing is the process of sanding, repairing, and resealing existing wood floors to restore their appearance without replacing them.
Tadas Wood Flooring has been restoring hardwood floors in Naperville and DuPage County since 2002, using dustless sanding systems and professional-grade finishes to bring 1,750+ worn, scratched, and dull floors back to life.
Quick Answers — What Naperville Homeowners Ask
➝ How much does hardwood floor refinishing cost?Most projects range from $4–$8 per square foot depending on floor condition, amount of sanding required, whether staining is included, and the finish system you choose. A typical Naperville 800sq ft home project runs $3,200–$4,800+
➝ How long does refinishing take?Typically 2–5 days, including sanding, optional staining, and drying time between finish coats.
➝ Is dustless refinishing really dust-free?Our system captures 97–98% of sanding dust at the source using cyclone vacuum equipment. An optional 100% dustless upgrade includes full-room containment and post-job cleaning.
➝ How long will refinished floors last?Usually 7–10+ years with normal use. With proper care like felt pads, no excess water, and hardwood-safe cleaners, floors often last longer between refinishes.
➝ Can all hardwood floors be refinished?No. Solid hardwood can be refinished multiple times. Engineered hardwood may be refinished once or twice, depending on wear layer thickness. Laminate cannot be refinished.
➝ Is it worth refinishing hardwood floors or replacing them?Refinishing is usually the better option if the wood is structurally sound. It costs significantly less, takes less time, and preserves the original flooring. Replacement is only needed for severe damage or very thin floors.
Quick Summary: Hardwood Floor Refinishing
- Best for worn, scratched, or dull solid hardwood floors
- Restores appearance and protects wood without full replacement
- Uses dustless sanding and professional finish systems
- Preserves existing wood and extends floor lifespan
- Suitable for most hardwood floors in Naperville homes
- In most cases, refinishing costs 60–80% less than full replacement
Service Facts (Naperville and DuPage County Homes)
- Typical project duration: 2–4 days for most homes
- Walkable after: 24 hours; full cure takes several days
- Odor level: Low with modern finishes and proper ventilation
- Refinishing limit: Solid hardwood floors can be refinished multiple times, depending on remaining wood thickness
- Not suitable for: Floors that are too thin, severely damaged, or structurally compromised.
- Engineered hardwood flooring: Must be inspected to confirm sufficient wear layer thickness.
Can Your Hardwood Floors Be Refinished?
- Solid hardwood (oak, maple, hickory, walnut) → Yes, multiple times
- Engineered hardwood → Sometimes, depending on wear layer thickness
- Laminate flooring → No
- Severely water-damaged or structurally compromised floors → Usually no, unless repaired
If you’re unsure, Tadas can assess your floors and give you a clear answer before any work begins.
Find out if your floors can be refinished
Get your → Free in-home evaluation
What Is Hardwood Floor Refinishing?
Hardwood floor refinishing removes the worn surface layer, repairs minor damage, and applies a new protective finish.
It's the most cost-effective way to:
- Remove scratches and wear patterns
- Eliminate dull, yellowed, or peeling finishes
- Change the stain color of your floors
- Extend the life of your existing wood
At Tadas Wood Flooring, hardwood floor refinishing is not just one of the services we offer — it’s what we specialize in.
Our process is designed to produce consistent, high-quality results, from careful sanding and detailed repairs to the application of durable, professional-grade finishes. In many cases, floors can be restored to a condition that looks even better than when they were first installed.
Whether your floors have light wear or are over 100 years old, we evaluate their condition and provide clear, honest guidance on what can be achieved.
Most hardwood floors in Naperville homes can be refinished in 2–5 days using professional dustless sanding systems and commercial-grade finishes, at a fraction of the cost of full replacement.
The Hardwood Floor Refinishing Process (Step-by-Step)
Every hardwood floor is different, but our refinishing process follows a proven structure designed to protect your floors, control dust, and produce consistent results.
STEP 1: Preparing the
Rooms, Floors
and Equipment
- Floors are swept and vacuumed
- Protruding nails are set below the surface, and repairs are addressed
- Sanding equipment is set up
- If the optional 100% dustless system is chosen, we seal off work areas and cover vents and cabinets
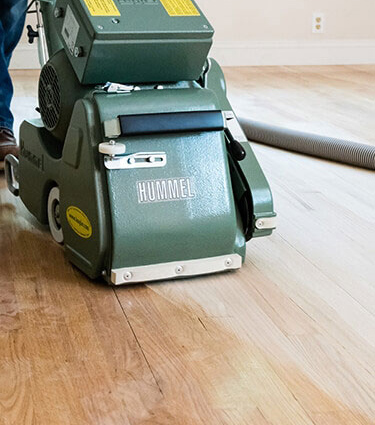
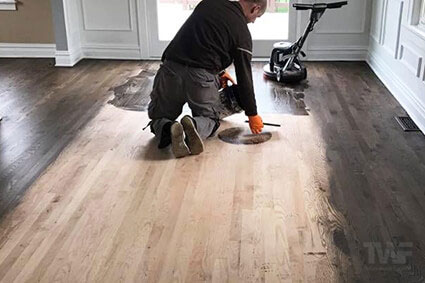
STEP 2: Removing
the Existing
Finish
- We remove the existing finish and take the floor back to bare wood
- The floor is flattened and leveled
- This involves multiple sanding passes using different grits of sandpaper and specialized sanding equipment
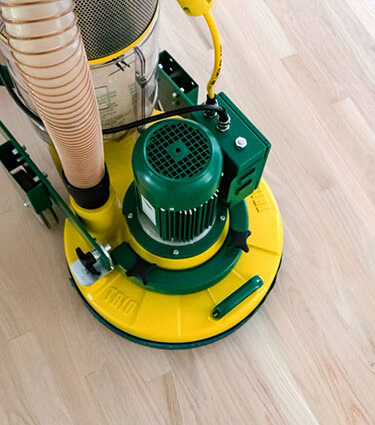
STEP 3: Fine, Detailed
Sanding
- Planetary sander is used, along with a progressively finer sequence of sandpaper
- We sand edges, corners, and tight areas the big sanders can't reach
- This step is essential for achieving an even, flat, consistent surface
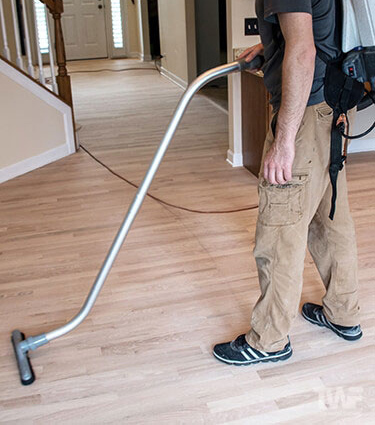
STEP 4: Thorough
Vacuuming and
Dust Removal
- We use industrial vacuum systems to remove any remaining dust or debris so it doesn't interfere with the next steps of the refinishing process.
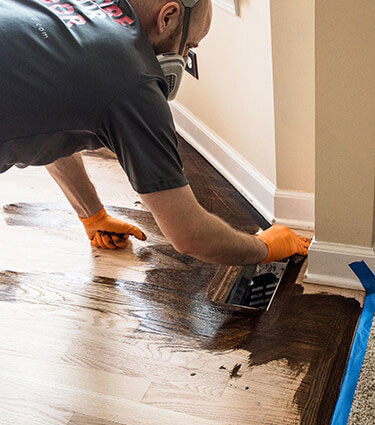
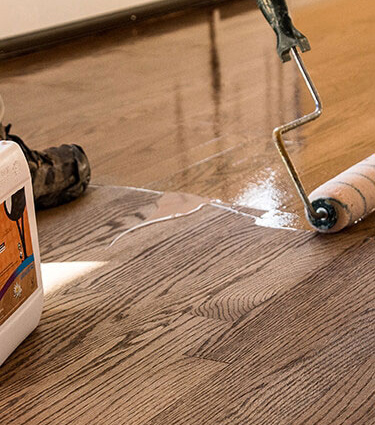
STEP 5: Staining
the Floor
(Optional)
- If you’ve decided to change the color of your hardwood floors, staining is completed at this stage
- Includes water popping and additional surface preparation to ensure consistent color
- A wide range of color options are available
STEP 6: Applying
the Finish
Coats
- Depending on the finish system you choose, this stage may involve applying one coat or multiple coats of finish
- After the final coat has dried, the refinishing process is complete and your floors are ready for light foot traffic within 24 hours, with full cure in several days.
Below are real hardwood floor refinishing projects completed in Naperville and surrounding areas...
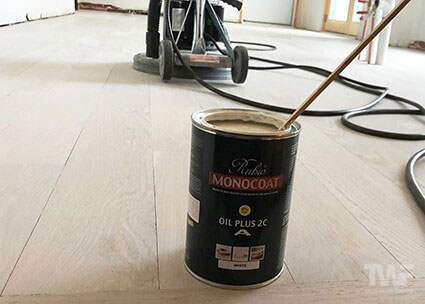
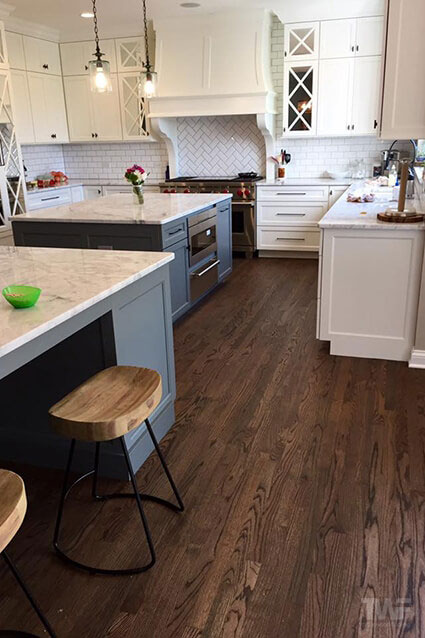
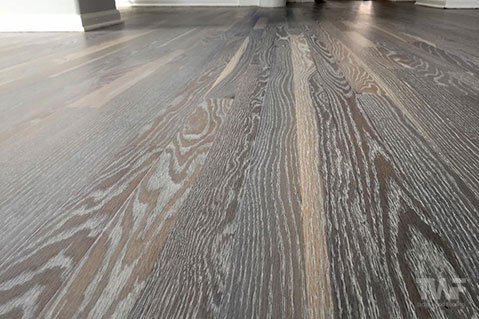
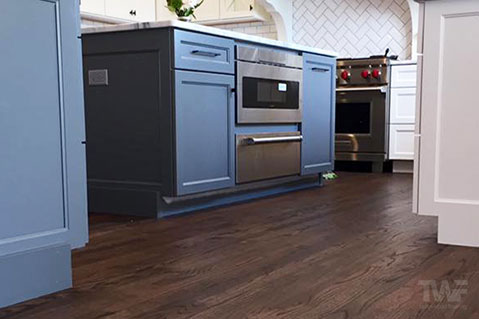
Naperville Red Oak Rubio Monocoat Black
THE CLIENT: Name asked to be withheld – Naperville, Illinois
THE JOB: These red oak floors throughout this beautiful home were sanded back to bare wood, water-popped, and coated with Rubio Monocoat Black — a perfect match for the blue kitchen cabinets.
THE DETAILS:
- Wood → Red Oak Flooring
- Finish → Rubio Monocoat
- Color → Black
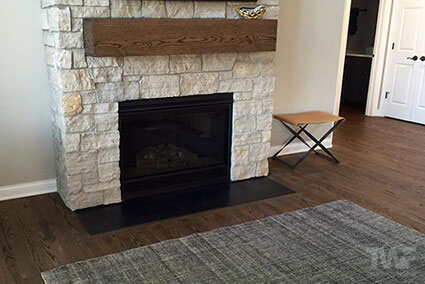

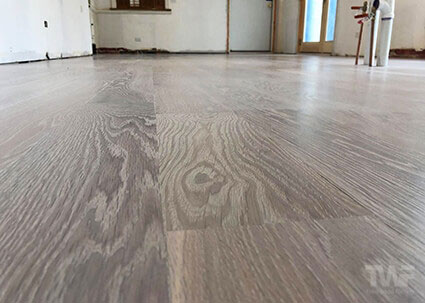
Naperville Project — Oak Floor Restoration
- Condition → Worn finish, surface scratches
- Solution → Full sanding + Rubio Monocoat finish
- Result → Clean, modern look with original wood preserved
This project shows how refinishing restores the original wood while updating the overall look of the home.
HAPPY CLIENT feedback
HIS WORK IS AMAZING! He takes such pride and has a true passion for transforming your floors into whatever "look" you want... I LOVE MY KITCHEN FLOORS!
I cannot tell you how amazing Tadas and his team are. They were flexible in working with other subs (painters), his selection of finishes are beautiful and most importantly - HIS WORK IS AMAZING! He takes such pride and has a true passion for transforming your floors into whatever "look" you want.
I am an interior designer and I cannot wait to use Tadas again on future projects...I am so lucky that I got to use him in my own home!
THANK YOU TADAS & TEAM!
When Hardwood Floor Refinishing Is Not the Right Choice
Hardwood floor refinishing can restore many worn floors, but it isn’t always the best solution.
Refinishing may not be recommended if:
- The wood has been sanded multiple times and is now too thin
- There is extensive water damage, rot, or structural movement
- Deep pet stains or widespread discoloration that cannot be fully removed through sanding
- Floors are severely cupped, warped, or uneven
In these cases, repairs, partial replacement, or full replacement may be the better long-term option.
If only a small area is damaged or worn, a full sand and refinish may be unnecessary. In some cases, a targeted spot repair can be a more practical and affordable solution.
Tadas will give you a clear recommendation based on your specific floors.
Hardwood Floor Refinishing in Naperville & DuPage County
Tadas Wood Flooring provides hardwood floor refinishing throughout Naperville, DuPage County, and parts of Cook and Will County — with direct experience in the wood types and home styles common to the region.
Serving homeowners throughout:
- Naperville, IL
- Lisle, IL
- Wheaton, IL
- Downers Grove, IL
- Glen Ellyn, IL
- Hinsdale, IL
- La Grange, IL
- Clarendon Hills, IL
- Oak Brook, IL
- Woodridge, IL
- Burr Ridge, IL
- Lemont, IL
- Homer Glen, IL
- Surrounding DuPage County communities
Summary: Hardwood Floor Refinishing in Naperville
Most hardwood floors in Naperville homes can be refinished rather than replaced. If the wood is structurally sound, refinishing restores its appearance, extends its lifespan, and costs significantly less than installing new hardwood flooring.

FAQs About Hardwood Floor Refinishing
Still have questions? Here are clear answers to the most common things homeowners ask before refinishing hardwood floors.
➝ Can I stay home during refinishing?
Usually yes, but expect noise and some disruption to daily routines. Many homeowners choose to be out during sanding and coating.
➝ Will the smell and fumes be really bad?
No. Modern water-based finishes and hardwax oils are low-odor, especially with proper ventilation.
➝ What types of finishes are used?
Primarily durable, low-odor commercial grade water-based finishes and hardwax oils like Rubio Monocoat and Pallmann Magic Oil.
➝ Can you repair an area in my floor that has water damage?
Yes. Damaged boards are replaced and blended before refinishing.
➝ I have a floating engineered floor, can it be sanded?
Sometimes. It depends on the wear layer thickness. An inspection is required before we know for sure.
➝ Will scratches be completely removed?
Most are removed during sanding. Severe damage and deep gouges may require board replacement.
➝ Can you change the color of my floors?
Yes. Staining allows for a wide range of color options.
➝ How soon can I walk on the floors?
Light foot traffic is safe within 24 hours. Full curing takes several days.
➝ When can I put back the furniture and area rugs?
Furniture: 24–48 hours. Rugs: 5–7 days for proper curing.
BLOG Articles about Refinishing
PDFs to Download
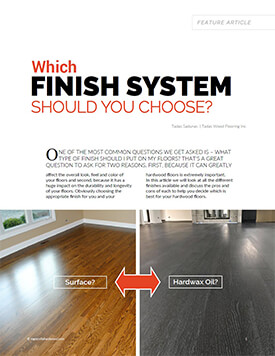
Which Finish System Should You Choose For Your Floors?
One of the most common questions we get asked. This detailed PDF guide walks through every finish option and helps you decide what's right for your floors.
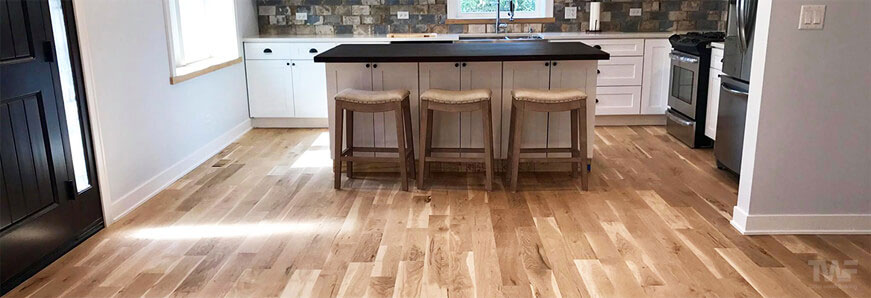
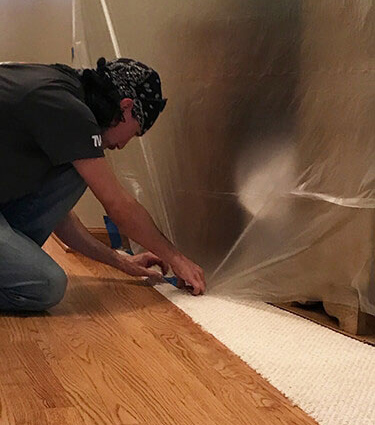
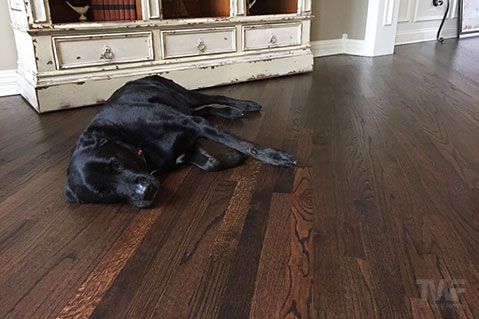
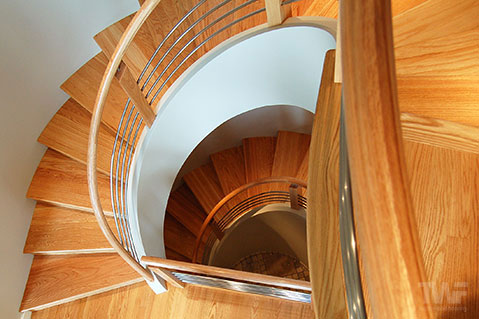
pdf Download PDF ArticlePHOTOS from past projects
HAPPY CLIENT feedback
Not only was Tadas at the house and working when he said he would be, but the end result is nothing short of amazing. Oh, and they get rid of all of the dust! I can't even begin to descibe to you how much better the house looks because of his work. If you're looking for someone to refinish your floors, hire this guy and his crew. Phenomenal customer service and fantastic results!!!Julia T. | Chicago, IL